Ads

Showing posts with label iPhone. Show all posts

Wednesday, September 11, 2013

iPhone NavigationGroup in Alloy

In this post I am going to share how to use iPhone NavigationGroup in Alloy project.

In Titanium this method used to create the NavigationGroup. Following example also covers below things
  • Creating NavigationGroup
  • Opening a new window in NavigationGroup
  • Closing NavigationGroup
 
iPhone NavigationGroup Example

 Example App: https://github.com/TiTutorial/alloy_navigation_group

Wednesday, September 12, 2012

Appcelerator Titanium Alloy Framework

My Presentation About Appcelerator Alloy Frame work


Here you can download the complete working project from my Github account  Appcelerator Titanium Alloy Sample App

Tuesday, August 14, 2012

Top 5 Visited Posts

Here are the Top 5 visited post on titaniumtutorial.com based on Google Analytics stats.

Post
Appcelerator Cloud Push Notification in Android
Push Notification for Android using Appcelerator Cloud Service(ACS)
Launch third-party apps from Titanium App
Launch iOS Native(Map,Settings,Browser,..etc)/Third-party applications from our Titanium Application
Appcelerator Cloud Push Notification in iPhone
Push Notification for iOS using Appcelerator Cloud Service(ACS)
Appcelerator Cloud Service Custom Object and Query
Custom Objects using >Appcelerator Cloud Service and Query(Order by, Greater than, Less Than, Equal) the Objects
WebView in Appcelerator Titanium
WebView in Appcelerator Titanium with events explanation

Wednesday, July 4, 2012

Appcelerator Cloud Push Notification in iPhone


Push Notification in iOS Using Appcelerator Cloud Service

We can implement Push Notification in iOS using Appcelerator Cloud Service in 5 steps.
  1. Cloud User Login
  2. Retrieve Device Token
  3. Subscribe a Channel
  4. Push Certificates
  5. Push Configuration 

1)Cloud User Login
Create a test user in Appcelerator Cloud Console 
My Apps -> Manage ACS ->  DEVELOPMENT ->  Users
and login with credential. Use below code for cloud user login

Appcelerator Cloud Push Notification in iPhone

 
    var Cloud = require('ti.cloud');

    Cloud.Users.login({
        login: 'push123',
        password: 'push123'
    }, function (e) {
    if (e.success) {
    var user = e.users[0];
     alert("Loggin successfully");
        } else {
            alert("Error :"+e.message);
        }
    });
 
2)Retrieve Device Token
You can Retrieve Device Token using below code
 

    Titanium.Network.registerForPushNotifications({
        types: [
            Titanium.Network.NOTIFICATION_TYPE_BADGE,
            Titanium.Network.NOTIFICATION_TYPE_ALERT,
            Titanium.Network.NOTIFICATION_TYPE_SOUND
        ],
    success:function(e)
    {
        deviceToken = e.deviceToken;
        alert("deviceToken = "+deviceToken);
        registerForPush();
    },
    error:function(e)
    {
        alert("Error: "+e.message);
    },
    callback:function(e)
    {
        alert("push notification received"+JSON.stringify(e.data));
    }
    });


3)Subscribe a Channel
Add following code for channel subscribtion
 
    Cloud.PushNotifications.subscribe({
        channel: 'demo_alert',
        type:'ios',
        device_token: deviceToken
    }, function (e) {
        if (e.success) {
            alert('Success :'+((e.error && e.message) || JSON.stringify(e)));
        } else {
            alert('Error:' + ((e.error && e.message) || JSON.stringify(e)));
        }
    });

4)Push Certificates
It is most important part of this Tutotial, Appcelerator Doc clearly expained about how to create push certificates. http://cloud.appcelerator.com/docs/ios#push
Follow this section("Provisioning your Device for specialized Development") to create Development and Production Push certificates. Your certificates should be in .p12 format.

5)Push Configuration
After getting the push certificates(in my case I have created development push certificate), upload it in cloud console. 
My Apps -> Manage ACS ->  DEVELOPMENT ->  Settings -> Apple iOS Push Certificates

Appcelerator Cloud Push Notification in iPhone


Cool.., You have completed  Push Notification setup. This time for testing, run the application in iOS device and click the button "REGISTER PUSH NOTIFICATION". You will get 3 alerts continuously.

Then go to My Apps -> Manage ACS -> DEVELOPMENT -> Push Notifications, here you can see "1 iOS clients subscribed to push notifications"


 It is time to send push notification, enter the values and hit the button "Send Push Notification" instantly you will receive notification in your iOS device(with default icon and sound)

Appcelerator Cloud Push Notification in iPhone
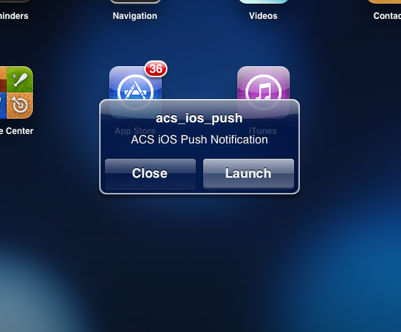
Push Notification in iPad

Appcelerator Cloud Push Notification in iPhone
Push Notification Callback


Here you can download the complete working project from my Github Appcelerator Titanium iOS Push Notification

If anyone found difficulties in push notification implementation feel free to contact me

CodeStrong


Monday, July 2, 2012

Titanium Layout

In Titanium, windows and views have layout property. There are three types of Layout available in Titanium
  1. Composite or Absolute (default)
  2. Vertical
  3. Horizontal
Composite or Absolute (default)
It is default layout. A child view is positioned based on its positioning properties(top, bottom, left, right and center). If no positioning properties are specified, the child is centered.
var win = Ti.UI.currentWindow;

var label1 = Ti.UI.createLabel({
    text : 'Sample Text 1',
    color : 'blue',
    height : 40,
    width : 180,
    top : 100,
    left : 60,
    font:{fontSize:14, fontWeight:'bold'},
    textAlign : 'center'
});
win.add(label1);

var label2 = Ti.UI.createLabel({
    text : 'Sample Text 2',
    color : 'blue',
    height : 40,
    width : 180,
    top : 160,
    left : 60,
    font:{fontSize:14, fontWeight:'bold'},
    textAlign : 'center'
});
win.add(label2);

var label3 = Ti.UI.createLabel({
    text : 'Sample Text 3',
    color : 'blue',
    height : 40,
    width : 180,
    top : 220,
    left : 60,
    font:{fontSize:14, fontWeight:'bold'},
    textAlign : 'center'
});
win.add(label3);

Vertical
In vertical layout all children are ordered one below the other(top to bottom). All child sandboxes have the same width (set to the parent's width).

The first child is laid out top units from its parent's bounding box. Each subsequent child is laid out below the previous child. The space between children is equal to the upper child's bottom value plus the lower child's top value.
var win = Ti.UI.currentWindow;
    win.layout = "vertical";

var label1 = Ti.UI.createLabel({
    text : 'Sample Text 1',
    font:{fontSize:14, fontWeight:'bold'},
    color : 'blue',
    top : 50
});
win.add(label1);


var label2 = Ti.UI.createLabel({
    text : 'Sample Text 2',
    font:{fontSize:14, fontWeight:'bold'},
    color : 'blue',
    top : 50
});
win.add(label2);


var label3 = Ti.UI.createLabel({
    text : 'Sample Text 3',
    font:{fontSize:14, fontWeight:'bold'},
    color : 'blue',
    top : 50
});
win.add(label3);

Horizontal
In horizontal layout all children are ordered next to each other in a row.
All children in a row have the same sandbox height.

Here children are laid out horizontally from left to right, in rows. If a child requires more horizontal space than exists in the current row, it is wrapped to a new row. The height of each row is equal to the maximum height of the children in that row.
var win = Ti.UI.currentWindow;
    win.layout = "horizontal";

var label1 = Ti.UI.createLabel({
    text : 'Sample Text 1',
    font:{fontSize:14, fontWeight:'bold'},
    color : 'blue',
    left:10
});
win.add(label1);

var label2 = Ti.UI.createLabel({
    text : 'Sample Text 2',
    font:{fontSize:14, fontWeight:'bold'},
    color : 'blue',
    left:10
});
win.add(label2);

var label3 = Ti.UI.createLabel({
    text : 'Sample Text 3',
    font:{fontSize:14, fontWeight:'bold'},
    color : 'blue',
    left:10
});
win.add(label3);

CODESTRONG

Sunday, June 3, 2012

Appcelerator Cloud Service Custom Object and Query


Recently Appcelerator integrated cloud services with Titanium, in this post I am going to explain about bacics of Appcelerator Cloud Service(ACS)

What is Mobile Cloud Computing?
Mobile cloud computing is the usage of cloud computing in combination with mobile devices.
Cloud computing exists when tasks and data are kept on the internet(data are stored on servers at a remote location) rather than on individual devices, providing on-demand access.click here to know more

ACS Advantage
  • Create a server backed for your app instantly
  • Launch and scale your app automatically
  • No server coding or administration required
  • Scalability and Reliability
  • Flexibility
  • Reduced Cost
  • Increased Storage

What can we do with ACS?
Appcelerator provides around 15+ cloud services, among that few are

Standard(Tier 1)
  • Users
  • Files
  • Photos
  • Custom objects
  • Emails
  • Push notifications
Advanced(Tier 2)
  • Chats
  • Checkins
  • Events
  • Friends
  • Photo Collection
  • Places
  • Posts
  • Reviews
  • Message
  • Social integration

In this post I am going to explain how to 
  1. How to create cloud app?
  2. How to create cloud  user?
  3. How to create custom object?
  4. How to query custom object?
1. Create cloud App

Open your Titanium Studio and create a new ploject and make sure (Automatically cloud-enable this application should be checked)


After creating the project edit your tiapp.xml file you can see two(development, Production) set of cloud API keys. No need to worry about this it will be automatically mapped.

For example If run the App in simulator or Device it will use Development keys, If you create a signed pakage it will use Production keys.

Then login to Appcelerator cloud console and you can see yor newly created app

2.Create Cloud User

Include the ti.cloud module at top of your file then add below code to create a cloud User, Here I am creating a User with some sample data
   var Cloud = require('ti.cloud');
          Cloud.Users.create({
            username: "testuser1",
            password: "testuser1",
            password_confirmation: "testuser1",
            first_name: "test",
            last_name: "user1"
        }, function (e) {
            if (e.success) {
                var user = e.users[0];
                alert('Created! You are now logged in as ' + user.id);
                
            }
            else {
             if (e.error && e.message) {
                 alert('Error :' + e.message);   
             }
            }
            
        });
after creating a cloud user, the user will logged in automatically 
click Manage -> Development -> App Management -> Users
Here you can see the list of users, also you can edit the user detail

3.Create Custom Object

Cloud user can definec their own Custom Objects and object types, add beolow code to create a cloud custom object, before creating a custom object user must be logged in
    Cloud.Users.login({
      login  : 'testuser1',
      password: 'testuser1',
    }, function(e) {
      if (e.success)   {

        Cloud.Objects.create({
          classname : 'books',
          fields : {
            book_id : 1,
            title : 'Javascript',
            author : 'Peter'
          }
        }, function(e) {
          if(e.success) {
            alert("created");
          } else {
            alert('Error: ' + ((e.error && e.message) || JSON.stringify(e)));
          }
        }); 
                    
      } else {
        alert('Login Error:' +((e.error && e.message) || JSON.stringify(e)));
      } 
    }); 


click Manage -> Development -> App Management -> Custom Objects
Here you can see the list of custom objects, also you can edit the object


4. Query Custom Object

Here I am using three type of query
  if(e.index == 0){
   var params = {classname: "books",page: 1,per_page: 10}; // which is used for sellect object having classname = "books"
  }else if(e.index == 1){
   var params = {classname: "books",page: 1,per_page: 10, where: { author: "Peter"}};// which is used for sellect object WHERE author = 'Peter' and classname = "books"
  }else if(e.index == 2){
   var params = {classname: "books",page: 1,per_page: 10, where: { "book_id":{"$gte" : 2}}};// which is used for sellect object WHERE book_id > 2 and classname = "books"
  }

    Cloud.Objects.query(
     params
    , function(e) {
      if (e.success) {
                opLabel.text = JSON.stringify(e.books);
      } else {
                alert('Error: ' +((e.error && e.message) || JSON.stringify(e)));        
      } 
    })


Here you can download the complete working project from my Github account  Appcelerator Titanium Custom Object and Query


Thursday, May 17, 2012

Export CSV File in Titanium


One of my recent project I have exported tabular data into CSV file. In this post I will discuss about how to export CSV file in Appcelerator Titanium Application.

Here I have created a commonJS module for exporting tabular data into CSV file. The commonJs module function accept an argument and it export argument into CSV file.

The input argument(array) should be in following structure.
var input = [
    ["sample data 0", "sample data 1", "sample data 2"],
    ["sample data 0", "sample data 1", "sample data 2"],
    ["sample data 0", "sample data 1", "sample data 2"],
    ["sample data 0", "sample data 1", "sample data 2"]
];
In app.js add the below code
var csv = require('exportCsvData');

var win = Ti.UI.createWindow({
    backgroundColor:'#ccc',
    title:'CSV Import Module'
})

var createCsv = Titanium.UI.createButton({
    title:'Export CSV',
    top:'140',
    left:'110',
    height:'40',
    width:'115',
    color:'black'
});
win.add(createCsv);

win.open();

createCsv.addEventListener('click', function(e){
   var input = [
     ["sample data 0", "sample data 1", "sample data 2", "sample data 3"],
     ["sample data 0", "sample data 1", "sample data 2", "sample data 3"],
     ["sample data 0", "sample data 1", "sample data 2", "sample data 3"],
     ["sample data 0", "sample data 1", "sample data 2", "sample data 3"]
   ];
  
   var op = csv.exportCsvData(input);
   alert("Output file path = "+ op); 
});
Here is the code of exportCsvData.js which is a commonJS module
exports.exportCsvData = function(input)
{

    var rowTxt = "";
    for(var i=0;i < input.length; i++){ // row iteration
        for(var j = 0; j < input[i].length; j++){ // column iteration
            rowTxt += '"' + input[i][j] + '"';
 
            if(j < (input[i].length-1))
            {
                rowTxt += ',';
            }
        }
        rowTxt += '\n';// adding new line at end of row
    }

    // creating output file in application data directory
    var outputFile = Titanium.Filesystem.getFile(Titanium.Filesystem.applicationDataDirectory,'output.csv');
    // writing data in output file 
        outputFile.write(rowTxt); 


    if(outputFile.exists){
        alert("CSV generated!!!");
    }
    
    // return output file path
    return outputFile.nativePath;    
}

this module will return the output CSV file path

Saturday, April 14, 2012

Launch third-party apps from Titanium App

We can open Third-party applications from our Titanium Application.

Example 1:

We can open iOS Maps app by using the below code.
Ti.Platform.openURL('Maps://');


Example 2:

We can open iOS settings app by using the below code.

Ti.Platform.openURL('Prefs://');


We can open iOS LOCATION SERVICES in settings by using the below code.

Ti.Platform.openURL('prefs:root=LOCATION_SERVICES'); 


List of currently known URL Scheme in the Settings app
    prefs:root=General&path=About
    prefs:root=General&path=ACCESSIBILITY
    prefs:root=AIRPLANE_MODE
    prefs:root=General&path=AUTOLOCK
    prefs:root=General&path=USAGE/CELLULAR_USAGE
    prefs:root=Brightness
    prefs:root=General&path=Bluetooth
    prefs:root=General&path=DATE_AND_TIME
    prefs:root=FACETIME
    prefs:root=General
    prefs:root=General&path=Keyboard
    prefs:root=CASTLE
    prefs:root=CASTLE&path=STORAGE_AND_BACKUP
    prefs:root=General&path=INTERNATIONAL
    prefs:root=LOCATION_SERVICES
    prefs:root=ACCOUNT_SETTINGS
    prefs:root=MUSIC
    prefs:root=MUSIC&path=EQ
    prefs:root=MUSIC&path=VolumeLimit
    prefs:root=General&path=Network
    prefs:root=NIKE_PLUS_IPOD
    prefs:root=NOTES
    prefs:root=NOTIFICATIONS_ID
    prefs:root=Phone
    prefs:root=Photos
    prefs:root=General&path=ManagedConfigurationList
    prefs:root=General&path=Reset
    prefs:root=Sounds&path=Ringtone
    prefs:root=Safari
    prefs:root=General&path=Assistant
    prefs:root=Sounds
    prefs:root=General&path=SOFTWARE_UPDATE_LINK
    prefs:root=STORE
    prefs:root=TWITTER
    prefs:root=General&path=USAGE
    prefs:root=VIDEO
    prefs:root=General&path=Network/VPN
    prefs:root=Wallpaper
    prefs:root=WIFI
    prefs:root=INTERNET_TETHERING

Reference URL : iOS-url-scheme
NOTE : All url schemes to iOS settings will be removed in iOS 5.1

Wednesday, April 11, 2012

Google Geocode in Titanium Application

In my Titanium Application I have tried to use reverseGeocoder to find the current address (Street, City, State, Zip and Country) from the latitude and longitude.

But Ti reverseGeocoder does not return the exact address from the current latitude and longitude at all the time. It works only in few locations only.

So that I have move to Google Geocode API

Here is my sample code for how to use Google Geocode API in Titanium Application to get Street, City, State, Zip and Country value using latitude and longitude.

var addrUrl = "http://maps.googleapis.com/maps/api/geocode/json?sensor=true&latlng="+latitude+","+longitude;
/* web-service call */
var addrReq = Titanium.Network.createHTTPClient();
addrReq.open("GET",addrUrl);
addrReq.send(null);
 
addrReq.onload = function()
{
    var response = JSON.parse(this.responseText);
 
    if(response.status == "OK"){
        var resLen = response.results[0].address_components.length;
        for(var i=0; i < resLen; i++) {
            switch (response.results[0].address_components[i].types[0])
            {
                case "street_number":
                    Ti.API.info("street number : "+response.results[0].address_components[i].long_name);
                    break;
                case "route":
                    Ti.API.info("street name : "+response.results[0].address_components[i].long_name);
                    break;
                case "locality":
                    Ti.API.info("city name : "+response.results[0].address_components[i].long_name);
                    break;
                case "administrative_area_level_1":
                    Ti.API.info("state name : "+response.results[0].address_components[i].long_name);
                    break;
                case "postal_code":
                    Ti.API.info("zip code : "+response.results[0].address_components[i].long_name);
                    break;
                case "country":
                    Ti.API.info("country name : "+response.results[0].address_components[i].long_name);
                    break;
                }
        }
    }else{
        showAlert('','Unable to find Address');
    }
 
};

Monday, April 9, 2012

Google Analytics in Titanium Application

I have recently used Google Analytics to track pages and track events in My Titanium iOS Application. For that I have used Roger Chapman's Titanium Google Analytics Library. I have followed the below steps

STEP 1 : Create Google Analytics Account


You need to Create a Google Analytics Account click this link(http://www.google.com/analytics/) to get started.

After successful creating the account you will get a Google Analytic ID like similar to this one UA-18135349-1

STEP 2 : Add Google Analytics to Titanium App

add the below code in you app.js file


var analytics = new Analytics('UA-18135349-1'); //replace it with your Google Analytics ID

analytics.reset();

Titanium.App.addEventListener('analytics_trackEvent', function(e){
analytics.trackEvent(e.category, e.action, e.label, e.value);
});

Titanium.App.addEventListener('analytics_trackPageview', function(e){
var pagename = (e.pageUrl);
analytics.trackPageview(pagename);
});

Titanium.App.Analytics = {
trackPageview:function(pageUrl){
Titanium.App.fireEvent('analytics_trackPageview', {pageUrl:pageUrl});
},
trackEvent:function(category, action, label, value){
Titanium.App.fireEvent('analytics_trackEvent', {category:category, action:action, label:label, value:value});
}
}


// Function takes an integer which is the dispatch interval in seconds
analytics.start(10);

// You don't need to call stop on application close, but this is just to show you can call stop at any time (Basically sets enabled = false)
Titanium.App.addEventListener('close', function(e){
analytics.stop();
});


STEP 3 : Track Pages

in your win1.js(the page which you want to Track Page View) add the below code


// track page view on focus
win.addEventListener('focus', function(e){
Titanium.App.Analytics.trackPageview('all-listings/list-view'); // here 'all-listings/list-view' page url, you can use your custom url
});


STEP 4 : Track Events

Add below code in EventListener of the Control which you want to track. For example in my app I have to track the closeBtn event, so that I used below code


// pass the following parameters trackEvent(category, action, label, value)
closeBtn.addEventListener('click', function (e) {
Titanium.App.Analytics.trackEvent('Dialog','Cancel','CloseButton','');
win.close();
});


Okay. Cool now everything fine.But how to Check Google Analytics works or not?


Normally Google Analytics Account Activation takes 12 hrs to 1 day(if you created the account newly)

After the activation you can use the below link for real time testing(It will shows the last 30minutes activities)

https://www.google.com/analytics/web/#realtime

For TrackEvent you can check this one

We can't test TrackEvent immediately like(realtime analytics). It takes some time to reflect the changes.

How to test Google Analytics track event for Mobile Applications?

Wednesday, March 7, 2012

Create Album and Post Photos in Facebook Using Appcelerator Titanium

STEP 1
User Need to be Loggedin with Facebook

STEP 2
Have to create a album using Graph API
Titanium.Facebook.requestWithGraphPath('me/albums', {name: albumTitle, message: albumDescription}, 'POST', function(e) {

// handle the response(response will have the album id)
   if(e.success) {
     if(e.result) {
        var response = JSON.parse(e.result);
        var album_id = response.id;
        var path = album_id+'/photos'; // Here response.id represents Album id
     }
   } else if(e.cancelled) {
       Ti.API.debug("user cancelled");
   } else {
       Ti.API.debug(e.result);
   }
});

STEP 3
Post photos to facebook using Graph API along with album id(which we got in previous step)

Before posting photos we have to convert photos into blob, Let assume I am having 3 images(1.jpg,2.jpg,3.jpg) inside the App_root/Resources folder. First we need to convert it into blob, then have to post it in facebook using Graph API

var aTitle = "Test Album";
var aDescription = "my description";
var media = [];      
for(var i=1; i<=3; i++){
   var file = Titanium.Filesystem.getFile(i+".jpg");
   var blob = file.read();
   media.push({'message': 'myPic', 'picture': blob});
}


var path = album_id+'/photos';

for (var m = 0; m < media.length; m++){
  Titanium.Facebook.requestWithGraphPath(path, media[m], 'POST', function(e){
     if (e.success) {
        //message = "Successfully posted in Facebook";
     } else {
        if (e.error) {
          //message = e.error;
        } else {
          //message = "Unkown result";
        }
    }
  });
}
alert("Successfully posted in Facebook");


Here is my working sample code at gist (Tested in iPhone)

Tuesday, March 6, 2012

Titanium copy image to Clipboard

Titanium provides Clipboard functionality. So that we can able to copy images and texts in Clipboard.
Let assume you have some image files in local file system, by using below code you can able to copy image to Clipboard.


var currIamge = 'test.jpg' // mention your image path and name
var imageFile = Titanium.Filesystem.getFile(currIamge);
var imageBlob = imageFile.toBlob(); // convert image file into blob using toBlob() method
Ti.UI.Clipboard.setData('image/jpg',imageBlob);


PS : Tested with iPhone and it works fine

Sunday, March 4, 2012

WebView in Appcelerator Titanium

The Titanium Web View allows you to open an HTML5 based view which can load either local or remote content. Here I am going to give example for both Local and remote content.

1. WebView with local content
Here I have added some sample text to webview, the 'html' property will accept the HTML content.

var win = Ti.UI.currentWindow;
var textContent = '
Hi this is the sample text from the webview
';
var localWebview = Titanium.UI.createWebView({
top:0,
left:10,
right:10,
html:textContent,
height:320,
width:320,
backgroundColor:'transparent',
touchEnabled:false
});
win.add(localWebview);

2. WebView with remote content
Here I have added some remote content into the webview, for example I am loading a Facebook page in webview.

var win = Ti.UI.currentWindow;
Ti.App.fireEvent('show_indicator'); //display loading spinner until webview gets loaded
var fbUrl = "http://www.facebook.com";
var extwebview = Titanium.UI.createWebView({
top:0,
left:0,
right:0,
url:fbUrl,
height:440,
width:320,
backgroundColor:'#ccc'
});
win.add(extwebview); //adding webview in current window

extwebview.addEventListener('load', function() {
Ti.App.fireEvent('hide_indicator'); //Hide the Loading indicator after the webview loaded
})

var space = Titanium.UI.createButton({
systemButton: Titanium.UI.iPhone.SystemButton.FLEXIBLE_SPACE
});

var buttonClose = Titanium.UI.createButton({
title:"Done",
style:Titanium.UI.iPhone.SystemButtonStyle.DONE
});

var bottomToolbar = Titanium.UI.createToolbar({
left : 0,
bottom: 0,
height : 40,
width : 320,
items: [space,space, space,space, space, space,buttonClose]
})
win.add(bottomToolbar); // add close button at the bottom tabbar to close the webview

buttonClose.addEventListener('click', function (e) {
win.remove(extwebview);
win.remove(bottomToolbar);
});